


If your trying to upgrade your Amazon Lightsail WordPress instance you’ve come to the right place.
In this article, I will walk you through how to change your Amazon Lightsail WordPress Plan in the AWS Console.
Reason to Upgrade Your Lightsail Instance
I recently traveled down the path of wanting to upgrade my Lightsail instance after waking up one morning to find my $3.50 a month plan WordPress blog site unresponsive.
As my blog has grown over the past 6 months or so, I started to increasingly notice slow load times, occasional WordPress server crashing, and my instance cache running out of memory.
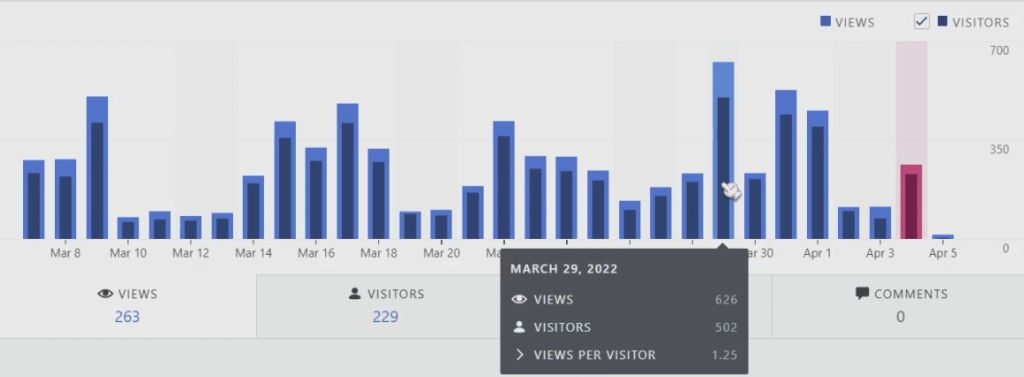
As you can tell in the image below, I don’t get too much traffic. I average around 300 users per day with occasional spikes to 600 or so. However, as I invest more time in this blog I do expect my traffic volume to increase more.
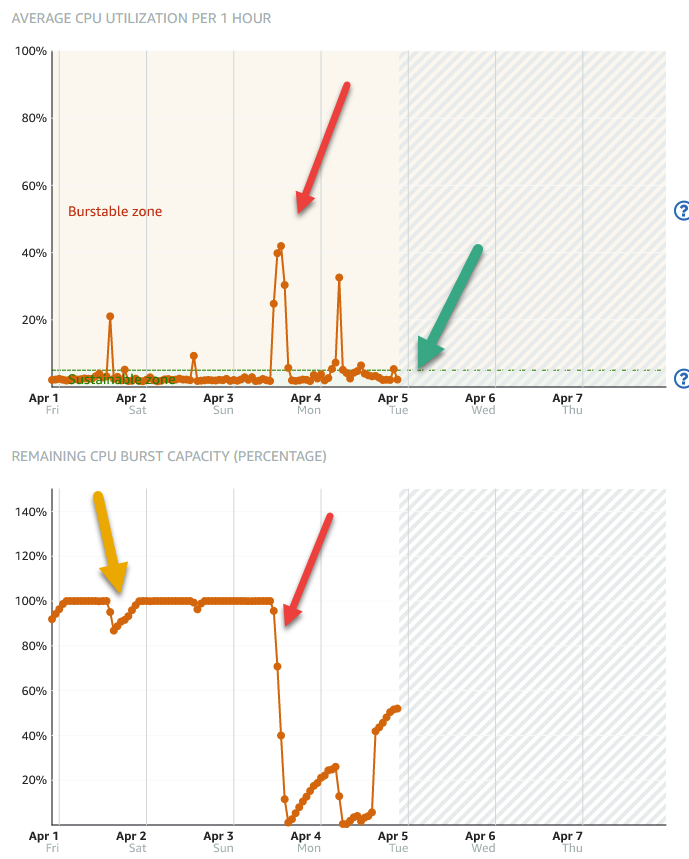
You can see in the image below from the Metrics section the issues my instance was experiencing. There were some high spikes in CPU utilization (red arrow in top chart). This exceeded all available burst capacity of the instance in resulted in it becoming unresponsive.
Even though the burst credits started to regenerate slightly, my instance still stayed unresponsive until I noticed the issue and restarted the instance manually.
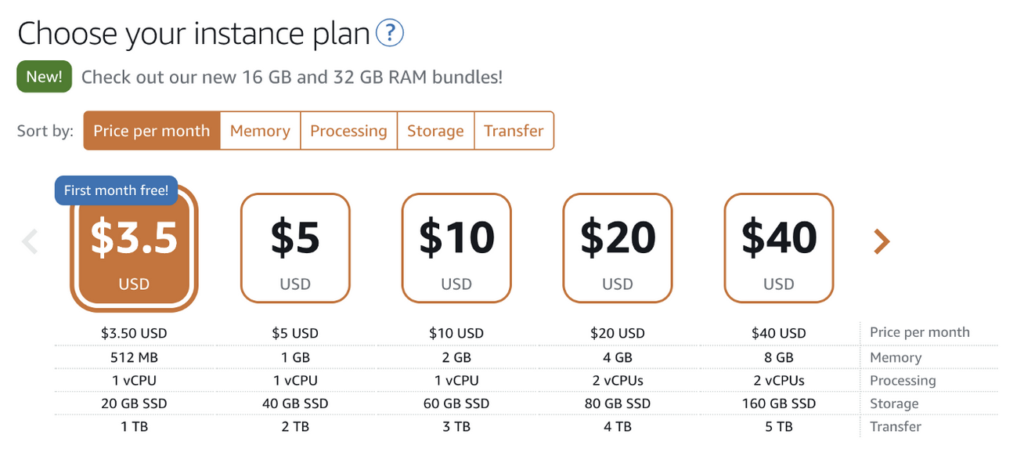
In light of the performance/stability issues I was already seen and expected growth, I decided it was time to upgrade my instance’s plan. You can learn more about Lightsail’s pricing model here. In my case, I’m going to be upgrading from the $3.50 month plan to the $5.00 month plan to get the extra 512MB of memory.
You may interested in …
Amazon Lightsail vs EC2 Ultimate Guide
Website Hosting Options on AWS – Picking the Right Option for You
Here are a preview of the steps you need to run through to upgrade your instance.
- Create a Lightsail Intance Snapshot
- Create a New Instance from your Snapshot with your updated plan
- Confirm your wordpress blog is running by visiting its public IP
- Swap your Static IP from your old instance to your new instance
We’ll walk through these steps in detail in the remainder of this article.
How To Upgrade Your Lightsail Instance
1. Create a Lightsail Instance Snapshot
To start, we need to create a snapshot of our existing instance’s disk so we can transfer the contents to the upgraded plan. To do this, navigate to your Lightsail instance in the AWS console and click on the Snapshots tab as seen below (red arrow).
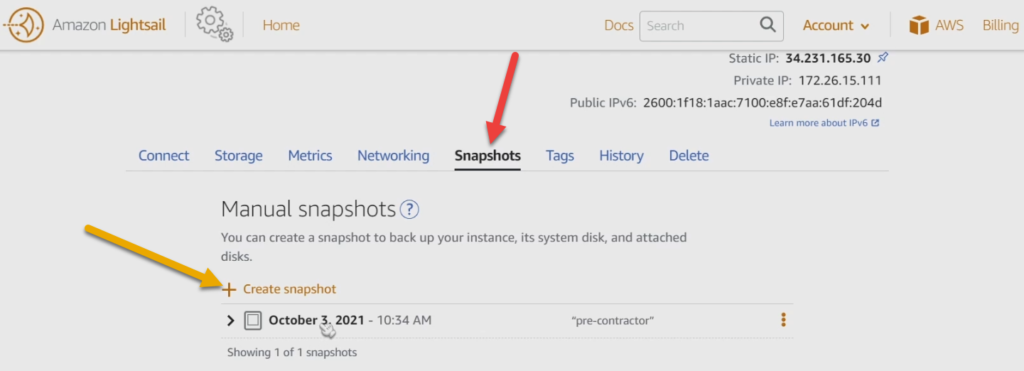
From here, click on Create Snapshot (yellow arrow) to start taking a snapshot of your instance. This can take a few minutes for the snapshot to be created so it may be a good time to grab a coffee.
Now we need to create a new instance with a better plan using the snapshot.
2. Create a New Instance from your Snapshot
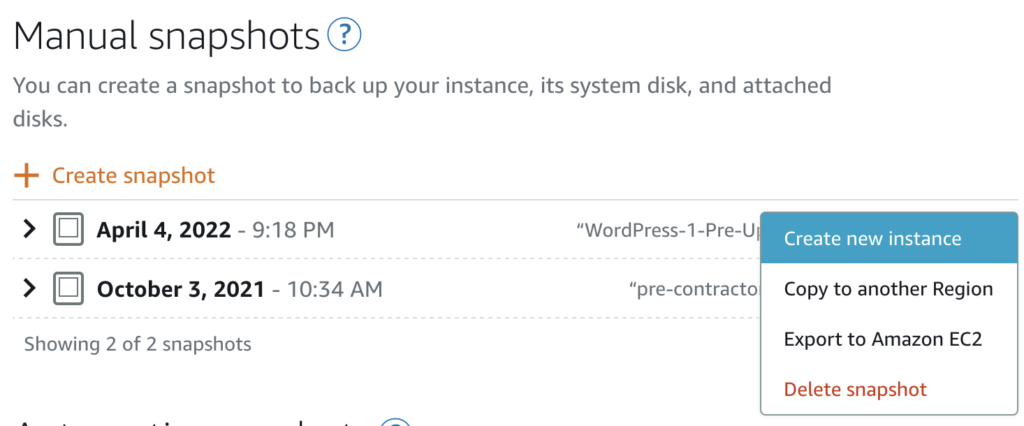
After the instance has been snapshotted, click the 3 verticle dot icons to the right of your instance name and click Create a new instance as seen below.
The selected settings will inherit from your instance’s existing settings. You can now select a new plan for your Lightsail instance.
In my case, was using the $3.50 / month plan. This instance only has a 5% sustainable zone for CPU Utilization. I’m going to be upgrading to the $5.00 / month plan which has a 10% sustainable zone. You can learn more about the cpu burst system in my previous article on Lightsail vs EC2.
Select the plan you’d like to copy your instance to and click Create Instance. After a few minutes, you should see your instance in Running state.
Next we will do a quick sanity test to make sure our server is running.
3. Confirm your WordPress website is running by visiting its public IP
Before you remove the static IP (which will effectively take the website offline), you should do a quick sanity test to make sure the WordPress server is up and running and serving your website. Note that if you’re using Lightsail for something other than WordPress (such as a MEAN/LAMP stack), you should follow a similar procedure to validate your application is running.
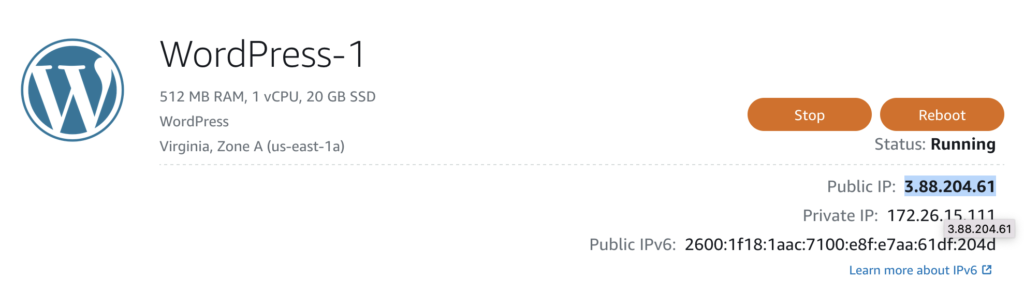
For WordPress users, find the Public IP of your new plan’s instance and insert it into your web browser. You can find your public ip in lightsail on the home page as seen below.
Make sure to wait a few minutes after creating your new instance to give the server a chance to start.
In my case, my public IP is 3.88.204.61. Putting this address into our web browser renders the home page of this WordPress based website. This validates that the server is up and running and capable of serving traffic.
Now, we need to detach our Public Static IP from the old instance and attach it to the new instance.
4. Swap your Static IP from your old instance to your new instance
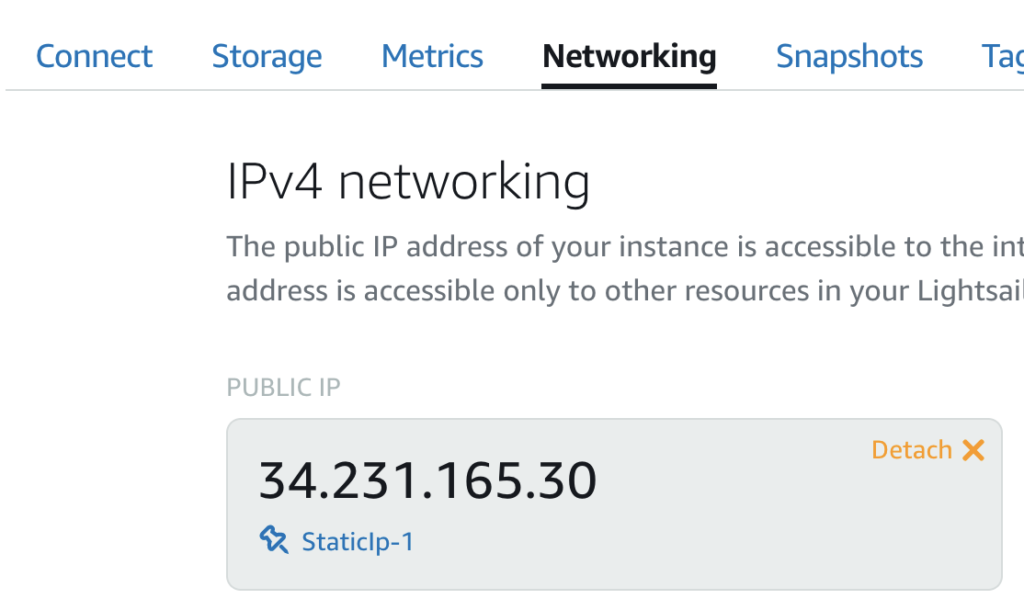
To swap your static ip from the old instance to the new one, we first need to detach it from our original instance.
Head over to the Network tab and click on the orange Detach text right above your static ip as seen below.
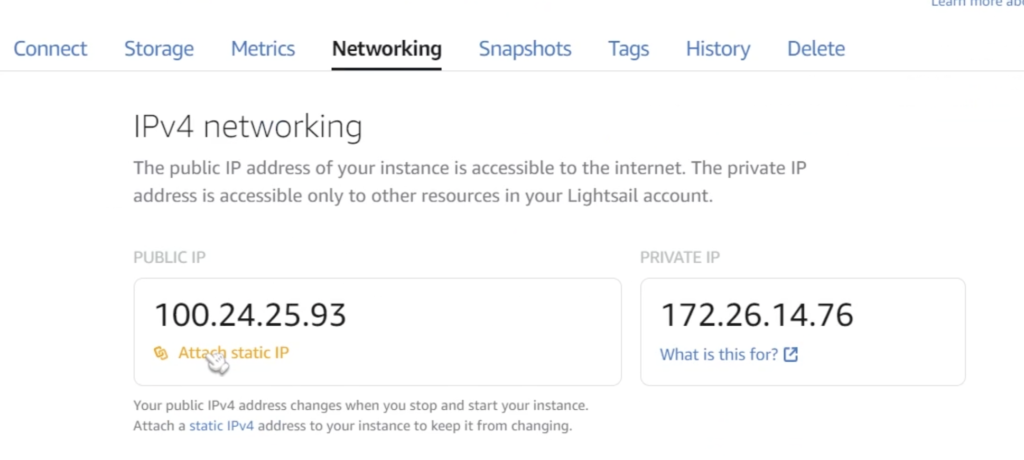
Now head over to your New Instance in the same section of the Lighsail console and click on Attach Static IP as seen below.
And you’re done!
Now all we need to do is head back over to our website and make sure its working properly. If you’re reading this article, it must have worked properly because this is the exact process I followed!


Your step by step guide is perfect….thanks.
Thank you Daniel – very helpful