Learn how to create an AWS Cloudwatch Alarm that sends you an email notification when an event occurs in this step by step video.
AWS cloudwatch is a popular service that allows users to create alarms that fire in response to events. Events can range from a metric passing a certain threshold, or simply the presence of a message in an SQS queue. Using Cloudwatch, you are able to create alarms that trigger using a variety of conditions (less than, greater than, equals) based on an metric data available to you in AWS.
In this video, I’m going to show you how to setup an alarm that triggers when our Lambda function’s error count exceeds 5 errors in 1 hour.
So lets get started…
First things first, sign in to your AWS account and head over to the Cloudwatch section. You can find it by typing Cloudwatch into the provided search bar.
After that, click on All Alarms under the Alarms submenu as seen below.

On the subsequent screen, click the big orange Create alarm button to launch the alarm creation wizard.

From here, click on Select Metric to specify the metric we want to use for our alarm. Note that you can use any metric that AWS provides, as well as custom metrics that you can define as part of your applications.
You may enjoy this video on AWS Cloudwatch Alarm ‘Insufficient Data’ – What Does It Mean?
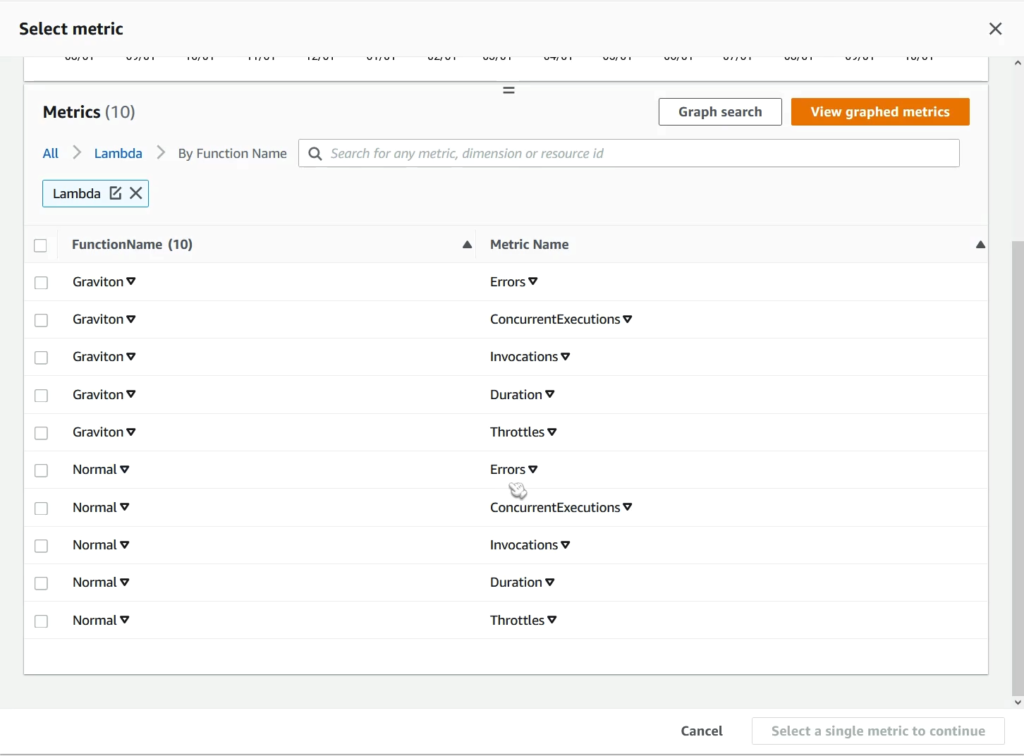
Follow the clicks as seen below to select the Lambda Errors metric by navigating it either by clicking the categories, or typing the category / metric name into the search box.

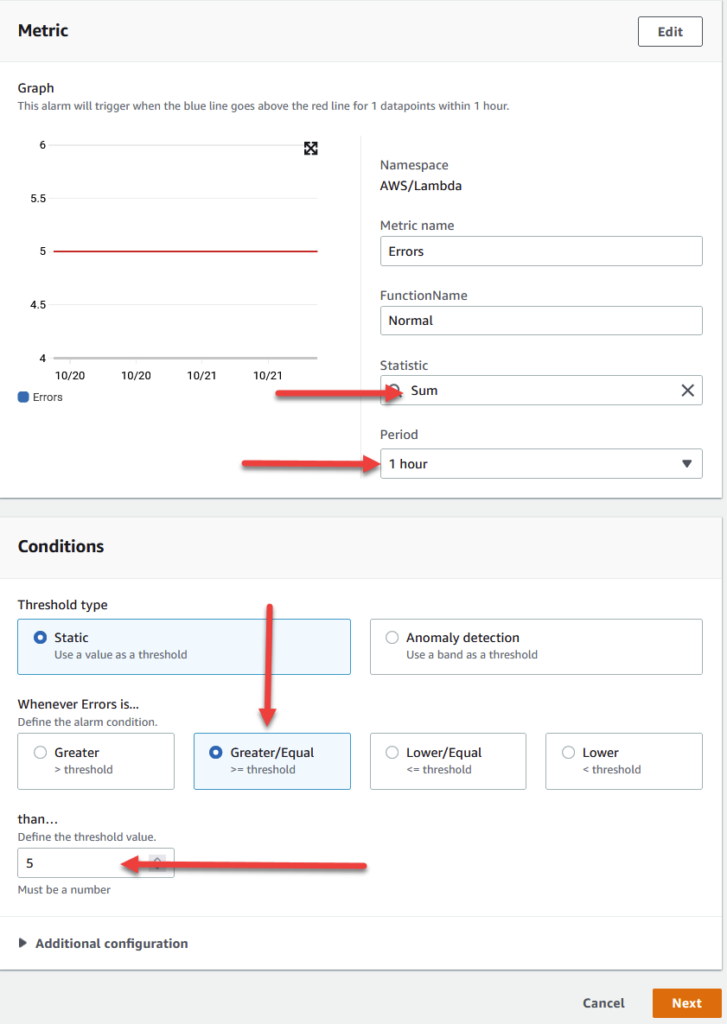
The next screen is where we set our alarm configuration. 1st things first, change your Statistic to Sum. By default it is set to Average which isn’t suitable for this case. The sum statistic will aggregate all errors into a single datapoint and be reflected on the graph with the corresponding value.
Secondly, change your Period to 1 hour. Using this setting, we’re going to be looking at 1 hour fixed windows that begin and end on the hour.
Lastly, select the Greater/Equal or >= threshold setting, and set the value to 5.
Once you’re done, you should have a configuration page that looks something like this:

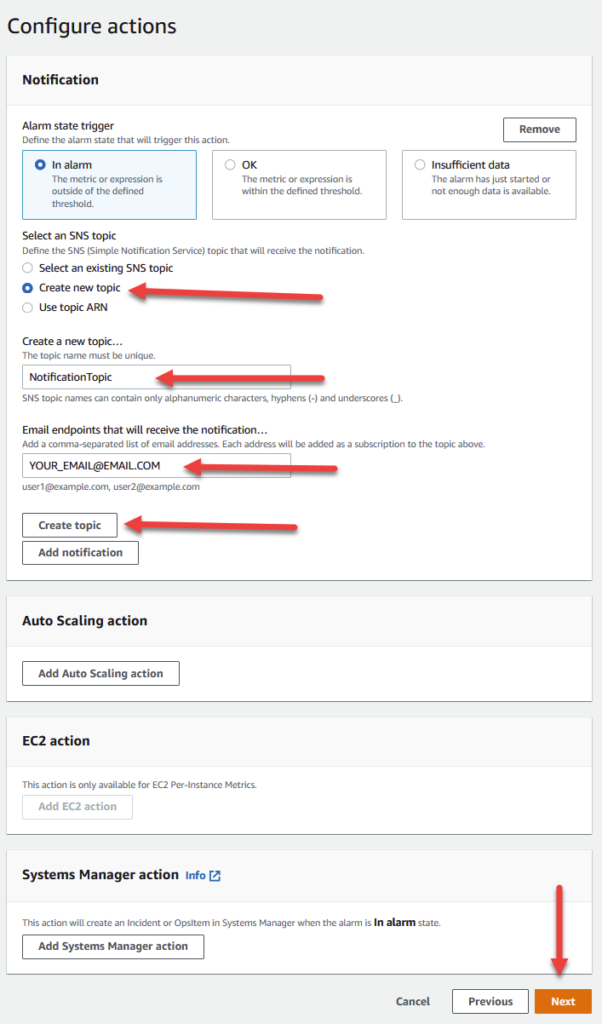
On the next screen, you’ll need to select Create new topic. Afterwards, you’ll be prompted to enter your topic name and email, go ahead and enter your an topic name, and an email where you’ll like to receive notifications.
By accepting the defaults, you’ll receive an email notification every time your alarm enters in alarm state. If this is undesirable (i.e. you want to be notified when the alarm enters OK state. You can have it both ways by clicking on the ‘add notification’ setting and repeating the process for the opposite.
Before you click next, make sure to click on Create Topic to finalize the notification step. For those of you wondering, this will create an SNS Topic that can be visible when navigating to the SNS console.
When you’re done, your config should look like below.

Finally, give your alarm a name and click next to finalize the alarm.

The final page will be a confirmation step. Go ahead and confirm the changes.
After you’re done, the Cloudwatch Alarm home page should show your alarm in Insufficient Data state as seen below. If you’re wondering what this means, its basically the default state when you create an alarm. You can learn more about it in this article.
You should see something like what we have below.

One thing to note is that in order to start receiving notifications to your email, you’re going to have to go to your email and click on the confirmation subscription. It will look like below.

Thats it! When your alarm state is triggered you should start receiving email notifications!
I hope you enjoyed this article. Let me know your thoughts below.


